🎨 AI Appearance
AI Appearance is a generative styling engine that translates your aesthetic descriptions into technical properties. Instead of manually adjusting HEX codes, border thicknesses, and corner radii, you can simply describe how a widget should look.
✨ Styling with Natural Language
To style a component, select it on the canvas and click the AI Appearance button in the Top Bar.
1. Describing Your Vision
The engine interprets a wide range of design languages, from industrial ruggedness to modern glassmorphism.
- Industrial: "Give this button a brushed steel texture with a 2px dark gray border and slightly rounded corners."
- Medical: "Style this slider with a clean white background, soft blue accents, and a high-contrast handle for accessibility."
- Automotive: "Apply a dark-mode carbon fiber aesthetic with glowing amber indicators."
2. Automatic Inspector Mapping
Once you submit a prompt, Artok doesn't just "paint" the widget; it populates the Property Inspector with real values.
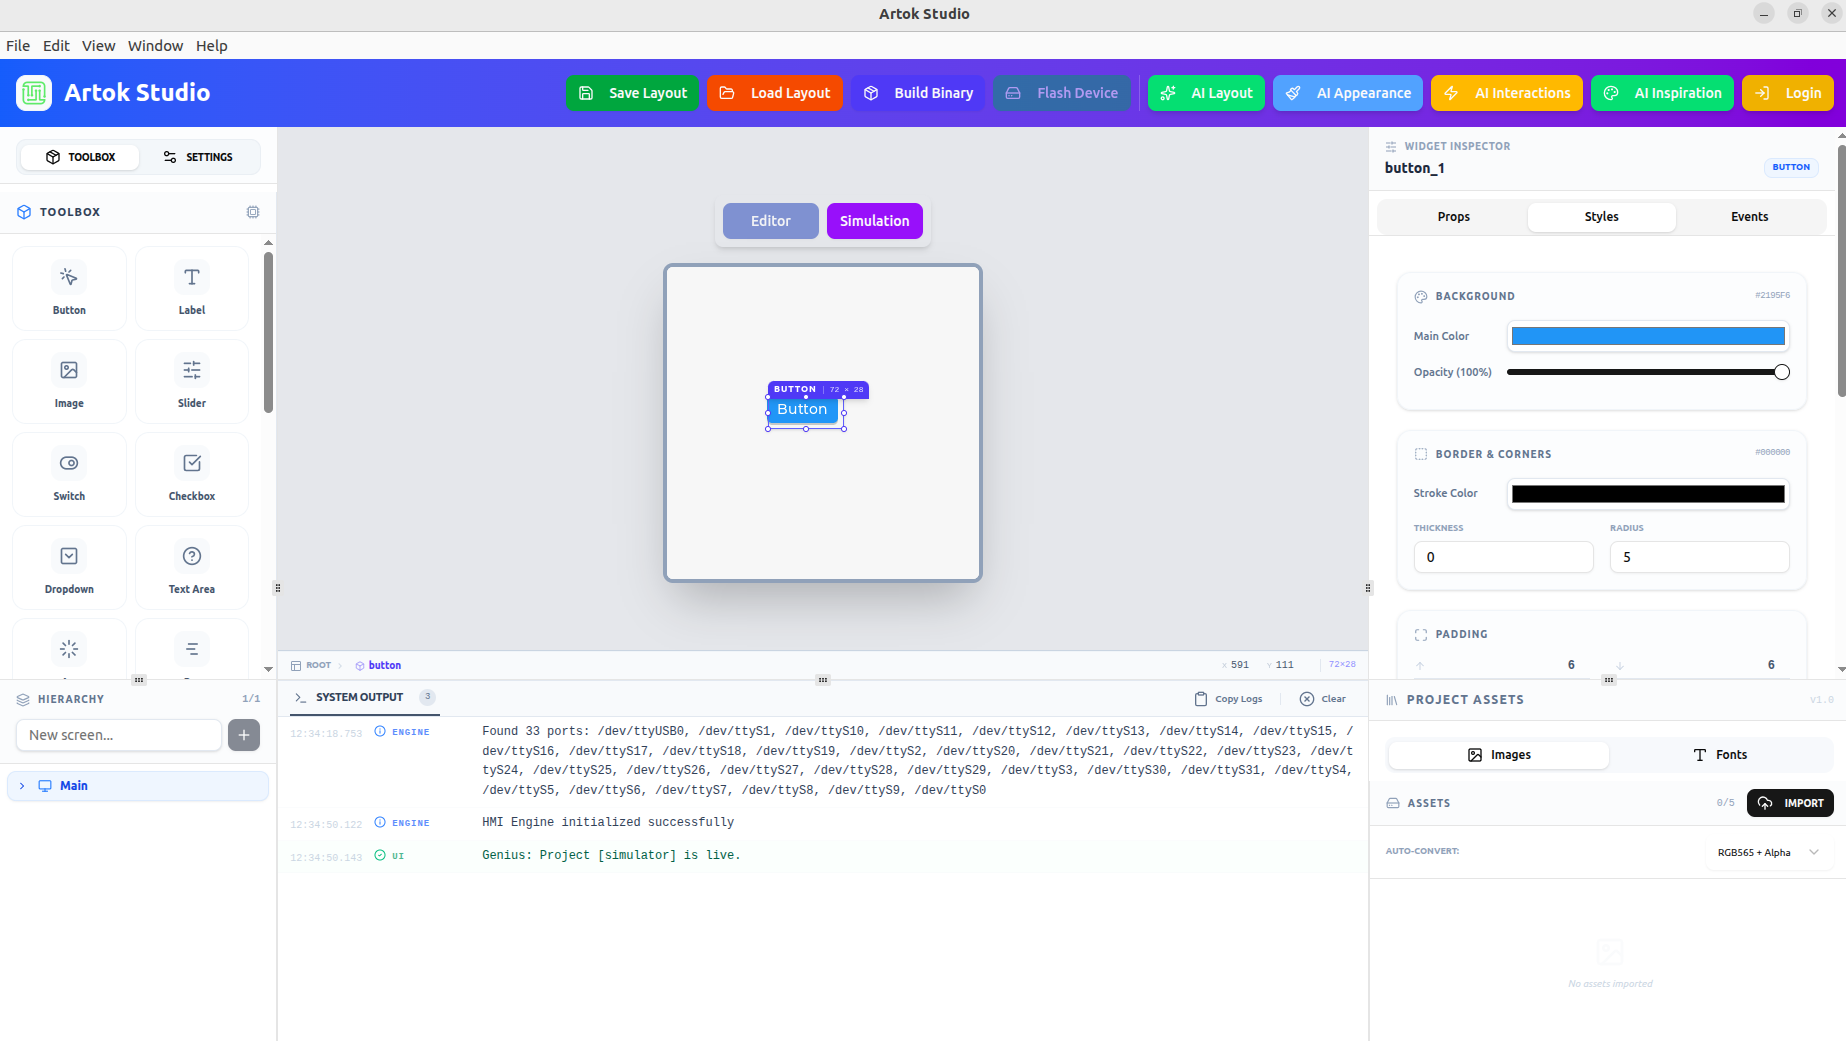 Figure 1: The AI automatically populates these background and border fields based on your prompt.
🛠 Key Capabilities
AI Appearance goes beyond simple color changes by managing the following properties simultaneously:
- Layering & Opacity: Automatically balances transparency for overlays.
- Complex Geometry: Calculates the perfect Corner Radius to match your design intent.
- Chiaroscuro (Depth): Generates shadows and highlights to create a 3D effect on flat 2D hardware displays.
- Consistency: When used on multiple widgets, the AI maintains a shared "Design System" across your project.
💡 Professional Workflow
For the best results on embedded hardware, follow this sequence:
- Select Widget: Click on the component you wish to style (e.g.,
gauge_1). - Prompt: Use the AI Appearance bar to define the theme.
- Refine: Check the Styles tab in the Inspector to tweak any specific values (like lowering opacity to save on MCU rendering cycles).
Complex styles involving high transparency or deep shadows can impact the FPS on lower-end microcontrollers. Use the Live Simulator to verify performance after applying AI styles.
Next Steps
Now that your HMI looks professional, make it functional:
- AI Interactions — Generate logic for your styled components.
- Logic and Events — Manually manage triggers and hardware responses.